Arduino Micro
Image Gallery
Overview
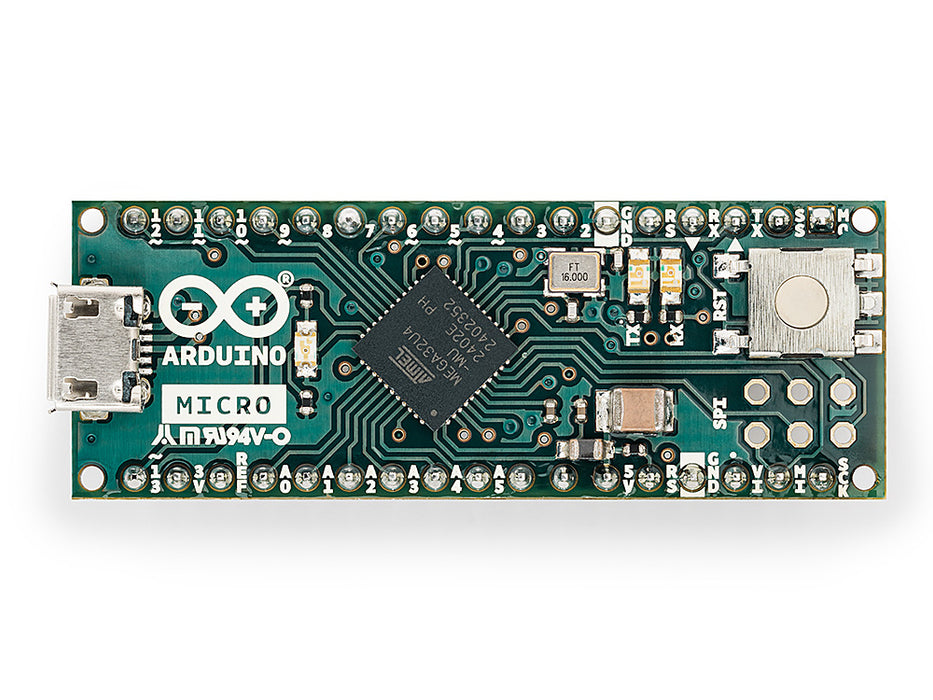
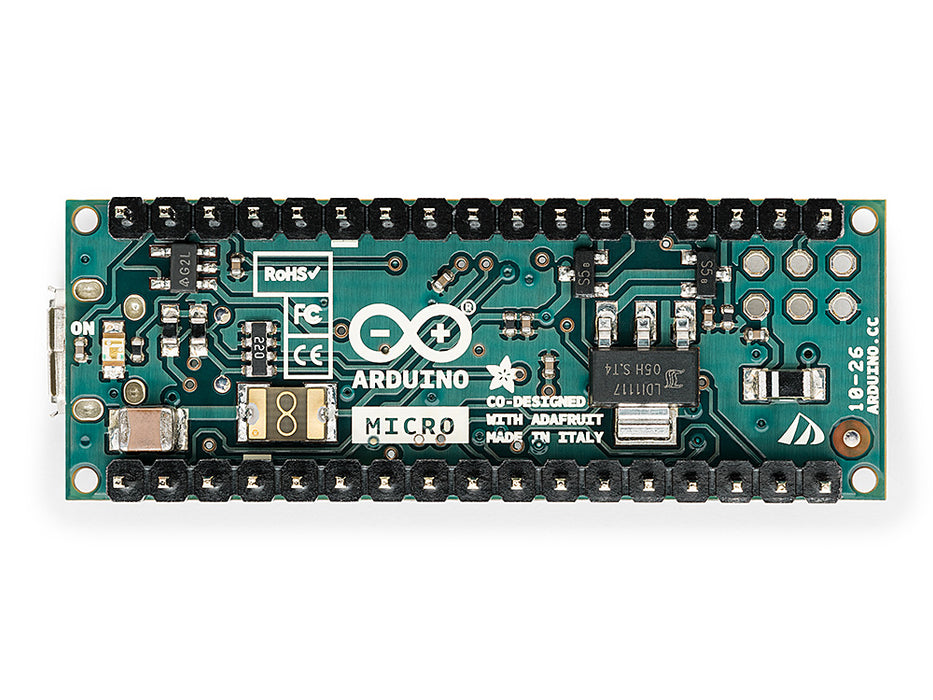
The Arduino Micro is a compact, breadboard-friendly microcontroller board built on the ATmega32U4 — the same MCU used in the Arduino Leonardo. At 48 × 18 mm, it is small enough to fit inside enclosures, embed in wearables, and mount directly onto a standard solderless breadboard using its 0.1-inch-spaced through-hole pins.
Like the Leonardo, the Micro's ATmega32U4 integrates the USB controller directly on-chip, enabling native USB HID support. The board can enumerate as a USB keyboard, mouse, MIDI device, or other HID class without any additional bridge hardware. This makes it a popular choice for custom USB input devices, macro pads, game controllers, and automation tools in compact packages.
Released in 2012 in collaboration with Adafruit, the Micro targets applications where the Leonardo's larger footprint is impractical but the HID capability is still required.
Quick Overview
| Property | Value |
|---|---|
| Microcontroller | ATmega32U4 (8-bit AVR) |
| Clock Speed | 16 MHz |
| Operating Voltage | 5V |
| Input Voltage (recommended) | 7–12V |
| Digital I/O Pins | 20 (7 with PWM) |
| Analog Input Pins | 12 |
| Flash Memory | 32 KB (4 KB used by bootloader) |
| SRAM | 2.5 KB |
| EEPROM | 1 KB |
| Hardware UART | 1 (Serial1 on D0/D1) |
| USB | micro-USB (native HID — ATmega32U4 integrated) |
| Form Factor | Breadboard compatible (0.1" pin spacing) |
| Dimensions | 48 × 18 mm |
Key Features
- Same ATmega32U4 as the Arduino Leonardo — native USB HID without a bridge chip
- Compact breadboard-compatible design (fits standard 0.1" solderless breadboards)
- 20 digital I/O pins (7 with PWM) in a small footprint
- 12 analog input channels for versatile sensor reading
- Native USB keyboard, mouse, MIDI, and joystick emulation
- Simultaneous USB CDC serial (Serial) and hardware UART (Serial1) on D0/D1
- Micro-USB connector for programming and power
- On-board power LED and user LED on pin 13
- Compatible with the Keyboard, Mouse, and MIDIUSB Arduino libraries
Technical Specifications
| Specification | Value |
|---|---|
| Microcontroller | ATmega32U4 |
| Architecture | 8-bit AVR |
| Clock Speed | 16 MHz |
| Operating Voltage | 5V |
| Recommended Input Voltage | 7–12V |
| Maximum Input Voltage | 20V |
| Digital I/O Pins | 20 |
| PWM Pins | 7 (D3, D5, D6, D9, D10, D11, D13) |
| Analog Input Pins | 12 (A0–A5 + A6–A11 on digital pins) |
| DC Current per I/O Pin | 40 mA |
| DC Current for 3.3V Pin | 50 mA |
| Flash Memory | 32 KB (4 KB bootloader) |
| SRAM | 2.5 KB |
| EEPROM | 1 KB |
| Hardware UART | 1 (Serial1, D0=RX1, D1=TX1) |
| USB Serial (CDC) | Serial (USB virtual port) |
| I2C | 1 (D2 SDA, D3 SCL) |
| SPI | 1 (ICSP header) |
| USB | micro-USB (native, ATmega32U4) |
| On-Board LED | Pin 13 |
| Dimensions | 48 × 18 mm |
Pinout
Digital I/O
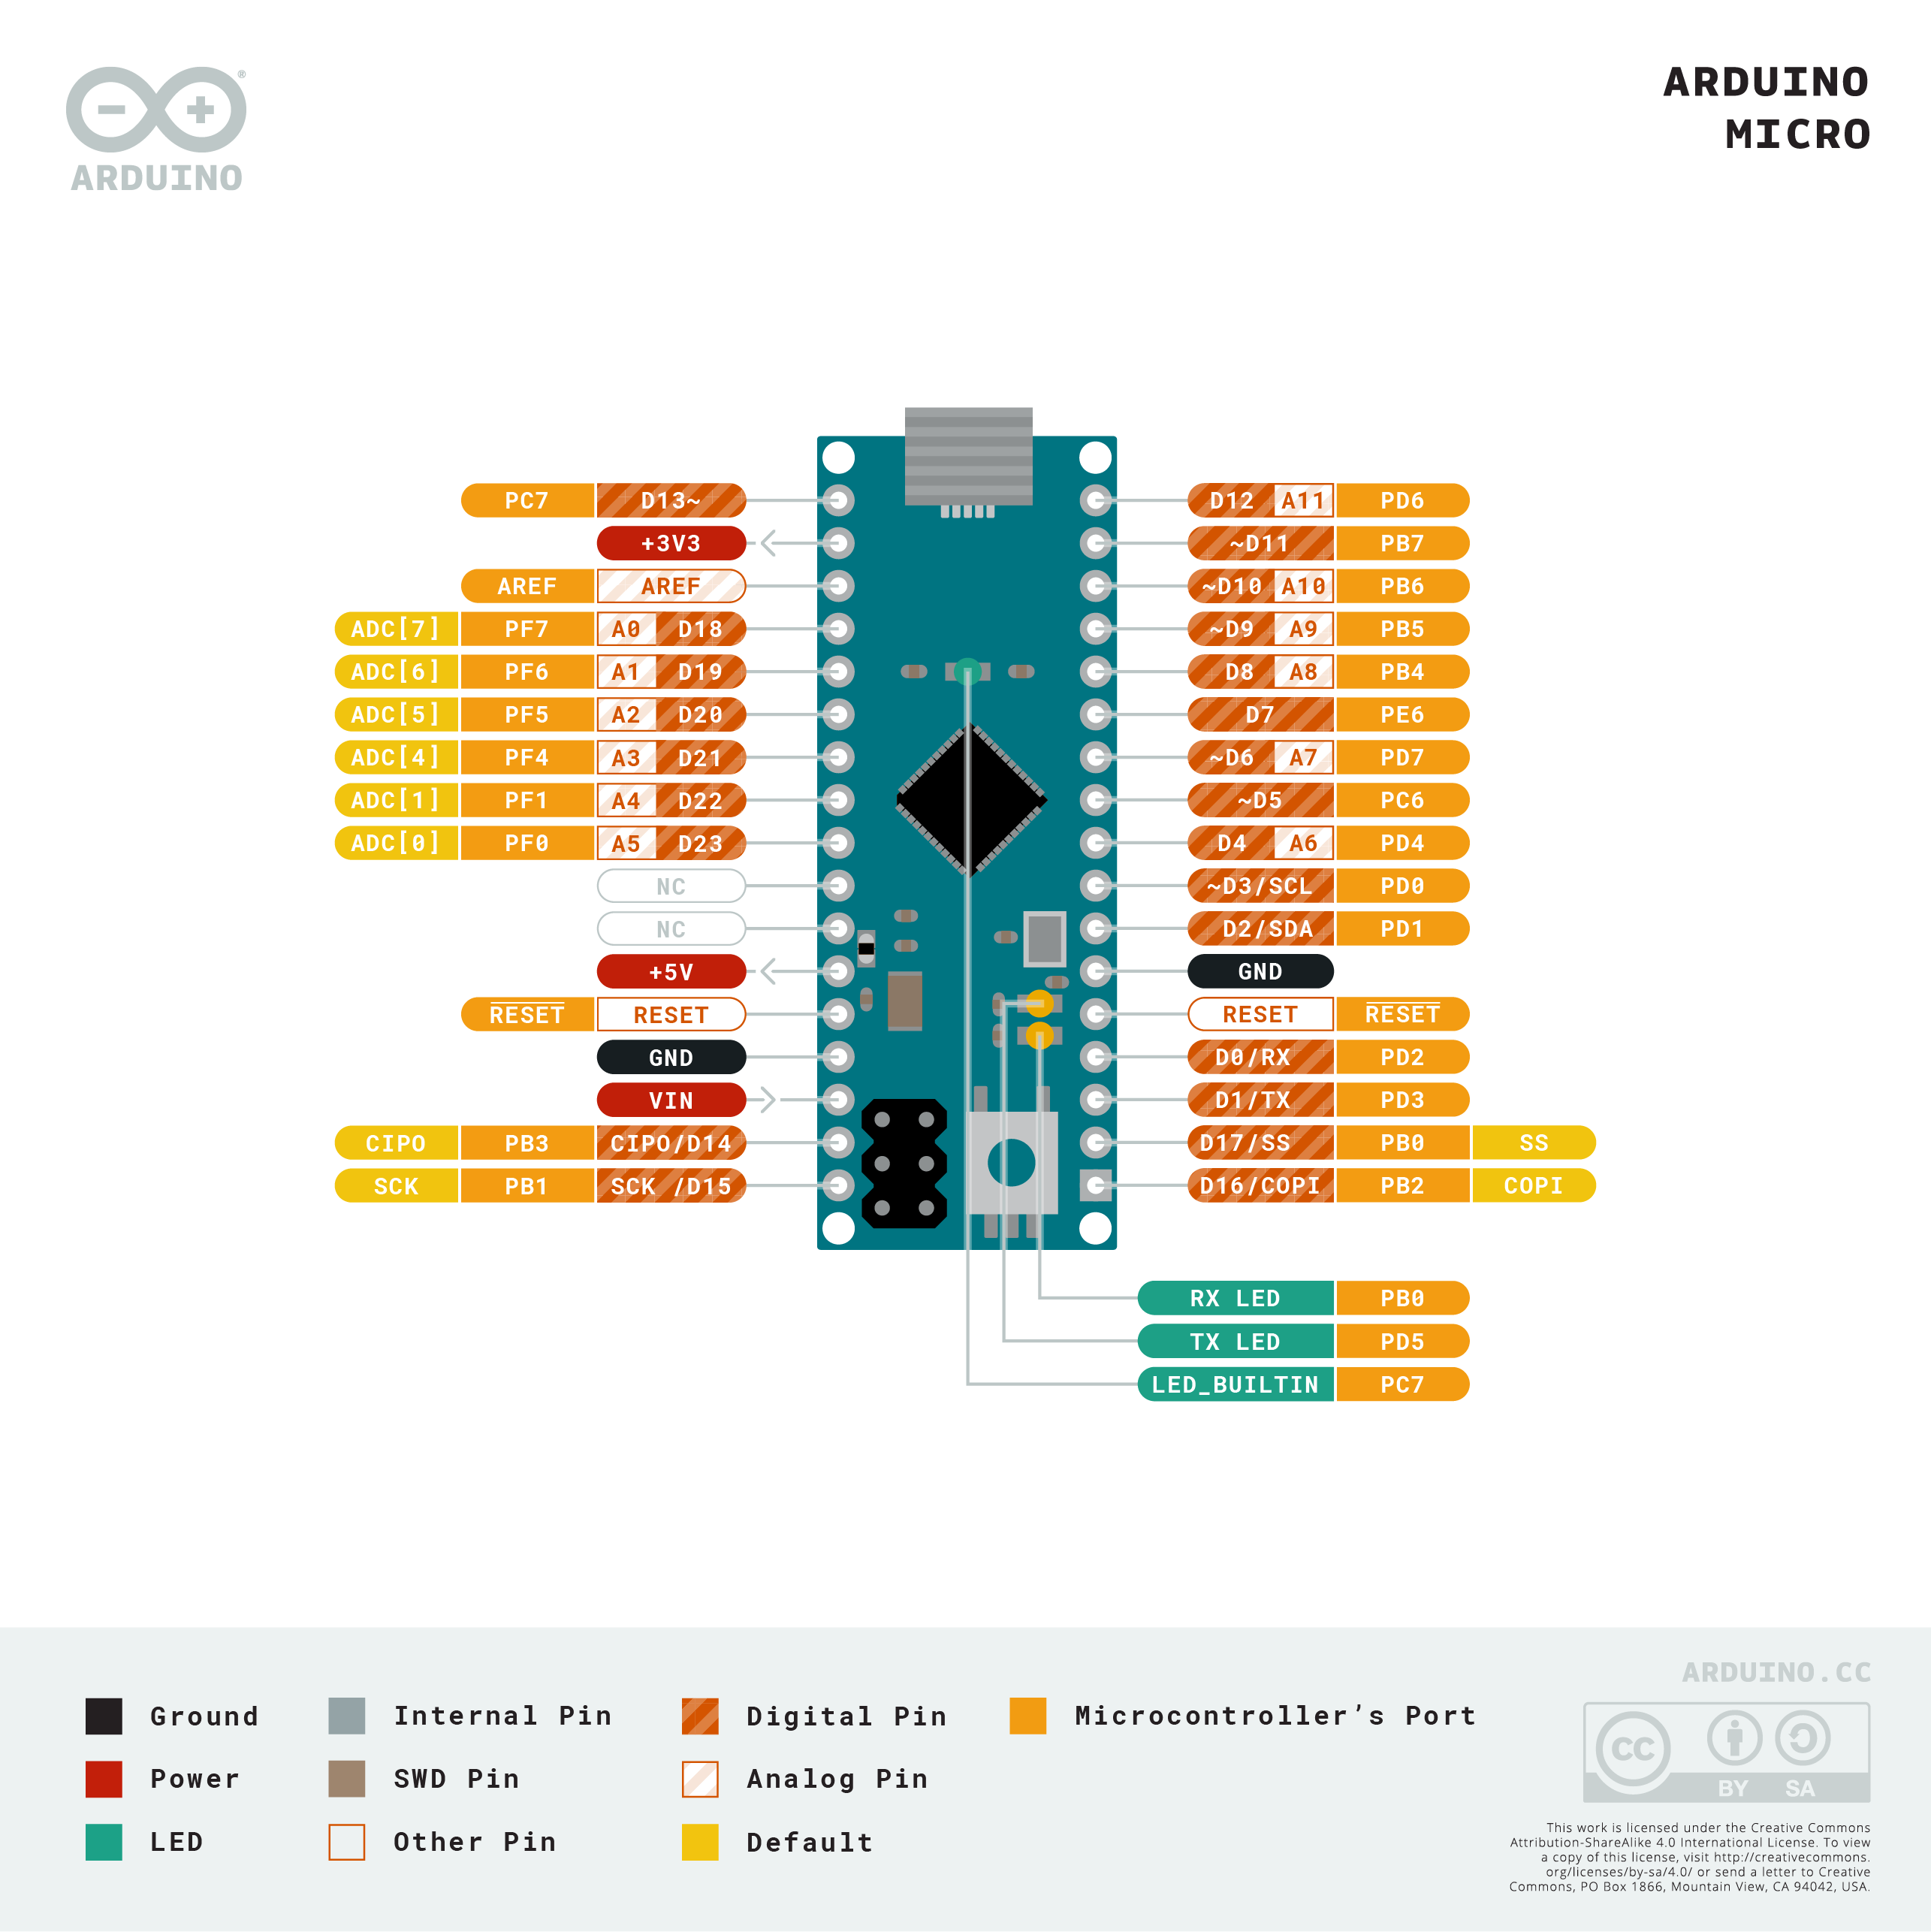
The Micro exposes its pins on two rows of through-hole pads along its long edges, designed to straddle a standard breadboard.
| Pin | Function | Notes |
|---|---|---|
| D0 (RX1) | Hardware Serial1 RX | Also digital I/O |
| D1 (TX1) | Hardware Serial1 TX | Also digital I/O |
| D2 | Digital I/O / SDA | I2C data |
| D3 | Digital I/O / SCL / PWM | I2C clock, PWM |
| D4 / A6 | Digital I/O / Analog | Dual-function |
| D5 | Digital I/O / PWM | PWM output |
| D6 / A7 | Digital I/O / Analog / PWM | Dual-function, PWM |
| D7 | Digital I/O | |
| D8 / A8 | Digital I/O / Analog | Dual-function |
| D9 / A9 | Digital I/O / Analog / PWM | Dual-function, PWM |
| D10 / A10 | Digital I/O / Analog / PWM | Dual-function, PWM |
| D11 | Digital I/O / PWM | PWM |
| D12 / A11 | Digital I/O / Analog | Dual-function |
| D13 | Digital I/O / PWM / LED | Built-in LED, PWM |
Analog Pins
| Pin | Notes |
|---|---|
| A0–A5 | Dedicated analog input pins on separate header pads |
| A6–A11 | Shared with D4, D6, D8, D9, D10, D12 |
Power Pins
| Pin | Description |
|---|---|
| VIN | 7–12V external input |
| 5V | Regulated 5V output |
| 3.3V | 3.3V output (50 mA max) |
| GND | Ground |
| RESET | Pull LOW to reset |
| AREF | Analog reference for ADC |
Power
The Arduino Micro is powered via:
- micro-USB: 5V from the connected computer or USB charger — the most common power source.
- VIN Pin: 7–12V from an external supply, regulated to 5V on-board.
- 5V Pin: Direct 5V supply (bypasses the regulator — ensure the source is stable and clean).
The compact size means the on-board regulator has limited thermal headroom for high-current loads. For power-intensive applications, supply regulated 5V directly to the 5V pin from an external source.
HID Support
The Arduino Micro supports the same native USB HID capabilities as the Arduino Leonardo, since both use the ATmega32U4.
| HID Class | Library | Example Use |
|---|---|---|
| USB Keyboard | Keyboard.h | Key presses, text automation, macros |
| USB Mouse | Mouse.h | Cursor movement, button clicks, scroll |
| USB MIDI | MIDIUSB.h | MIDI note and control messages |
| USB Joystick | Joystick.h (third-party) | Game controller input |
HID Keyboard Example
HID Mouse Example
Upload Consideration with HID Sketches
When a HID sketch causes the Micro to enumerate without a CDC serial port, the COM port disappears from the host OS. To upload a new sketch, press the RESET button on the Micro once while the IDE attempts to upload — this interrupts the HID sketch and briefly re-activates the bootloader.
Getting Started
What You Need
- Arduino Micro
- Micro-USB cable
- Solderless breadboard (optional but useful for the Micro's form factor)
- Computer with Arduino IDE installed
Steps
- If desired, insert the Micro into a breadboard — its pins span the central gap on a standard 5-row breadboard.
- Connect via micro-USB cable to your computer.
- Open the Arduino IDE.
- Select Tools > Board > Arduino AVR Boards > Arduino Micro.
- Select the correct COM port under Tools > Port.
- Upload the Blink sketch.
Blink Example
Serial Note
Like the Leonardo, Serial on the Micro is the USB CDC virtual port. Hardware serial on D0/D1 is Serial1. Always wait for the USB connection when using Serial in setup:
Programming
- Bootloader: Caterina bootloader (1200-baud USB CDC touch reset)
- Upload method: 1200-baud touch on the CDC serial port triggers reset into bootloader
- Manual reset: Press RESET button when "Uploading…" appears if auto-reset fails
- Board package: Arduino AVR Boards (included with Arduino IDE by default)
- No bridge chip: The ATmega32U4 manages USB directly at all times
Package Contents
| Item | Quantity |
|---|---|
| Arduino Micro board | 1 |
The Micro is sold with or without pre-soldered headers. A micro-USB cable is not included. For breadboard use, break-away 0.1" male headers are recommended if the board is supplied without them.
Applications
- Custom USB macro keypads and shortcut controllers
- Compact USB MIDI instruments and controller pads
- Embedded HID automation devices (fits inside keyboard cases, enclosures)
- Wearable electronics requiring USB connectivity
- Breadboard-based HID prototyping
- Custom USB game controllers and simulation inputs
- Space-constrained robotics and rover control boards
- USB-powered sensor logging with serial output
Where to Buy
Equivalent Boards
| Board | Key Difference |
|---|---|
| Arduino Leonardo | Same ATmega32U4 and HID capability, larger Uno form factor, not breadboard-friendly |
| Arduino Nano | Similar compact size, ATmega328P (no native HID), has USB via CH340/FT232 bridge |
| Arduino Pro Mini | Even smaller, no USB connector at all, no HID, requires FTDI adapter |
Documentation
Notes
- The Arduino Micro is electrically nearly identical to the Arduino Leonardo. Sketches written for the Leonardo run on the Micro without modification, and vice versa.
- The Micro's small size makes it ideal for permanent installs inside project enclosures. Its 0.1" pin spacing means it can also be soldered directly to custom PCBs.
- Third-party ATmega32U4-based boards (Pro Micro, etc.) are common clones. They may use different pin mappings or bootloaders — verify before swapping with official Micro boards.
- Pin A6–A11 are only available as analog inputs on the digital pin pads; they do not have separate labeled analog header pins like A0–A5.
- Power consumption is low enough for operation from a USB host's 500 mA port, but add up all peripheral loads before assuming this headroom is sufficient.
Community
- Arduino Forum — official community for questions and projects
- Arduino Discord — real-time chat with the Arduino community
- r/arduino (Reddit) — share projects and ask questions
- Arduino Project Hub — browse community-submitted projects
Revision History
| Version | Date | Notes |
|---|---|---|
| v1.0 | 2026-06 | Initial entry |